WEnRV travel news, products, and industry trends
How To Extend and Retract RV Slide-Outs
Want to get more out of your RV? Subscribe to the Camping World YouTube channel, and never miss a video.
RV slide-outs expand an RV floorplan dramatically allowing RV campers to enjoy things like extra seating, luxury appliances, and panoramic windows. This expanded living space makes it much more comfortable to move about your RV, and makes an RV feel more like home.
RV slide-outs aren’t complicated, but they do have mechanical moving parts that require correct use and some regular maintenance. Learn how to extend and retract slide-outs, and you’ll enjoy the huge (pun intended) benefits they offer to the camping experience.
If you want to know how frequently you should service your RV’s components, download our RV ownership and maintenance reference guide.
Types of RV Slide-Outs
 Photo by Camping World
There are several different RV slide-out systems, so consult your owner’s manual to learn which design your RV is equipped with. Once you do, here’s a little more detail on each:
Schwintek: These systems utilize a pair of gear-reduction drive motors that rotate a vertical aluminum shaft on each end of the slide-out. There are 2-3 brass pinion gears on each shaft that drive rack gears attached to the sides of the slide-out. Rack and pinion: Also known as “electric through-frame slides,” these have arms under the slide box connected to and operated by an electric actuator motor, which has a worm drive inside and is located out of sight in the belly pan. Cable: Designed with steel cables on all four corners. These cables can be seen on the slide’s exterior sides.Before Extending an RV Slide-Out
Before you extend an RV slide-out, your unit must be parked, properly leveled, and stabilized. Stabilizing jacks must be in place under your chassis before extending slides.
Never move an RV with the slides extended!
Watch this video to learn how to level and stabilize your RV if you aren’t familiar:
Once those steps are complete, here are your other pre-checks:
Make sure your slide-out has enough clearance to fully extend by knowing its depth and adding six inches to be safe. Ensure all people and passengers are clear of the slide-out and its components. Refrain from standing on the floor of the slide-out when extending or retracting. Remove slide-out locks (if applicable). Ensure the space above, below, and on the sides of your slide-out inside your RV is clear. Items may have shifted during your drive. Check every time! Make sure your RV battery is fully charged.Slide-outs can operate on 12-volt DC power from your RV battery. If your battery is charged, you don’t need shore power to extend slide-outs.
Technician Tip: You can also connect your 7-way electrical cord to your tow vehicle to supply the necessary voltage to retract slide-outs or stabilizing jacks. This only works on travel trailers and 5th wheels, but it’s a good option if your battery has been discharged too far and there’s no shore power source to plug into nearby.
How To Extend RV Slide-Outs
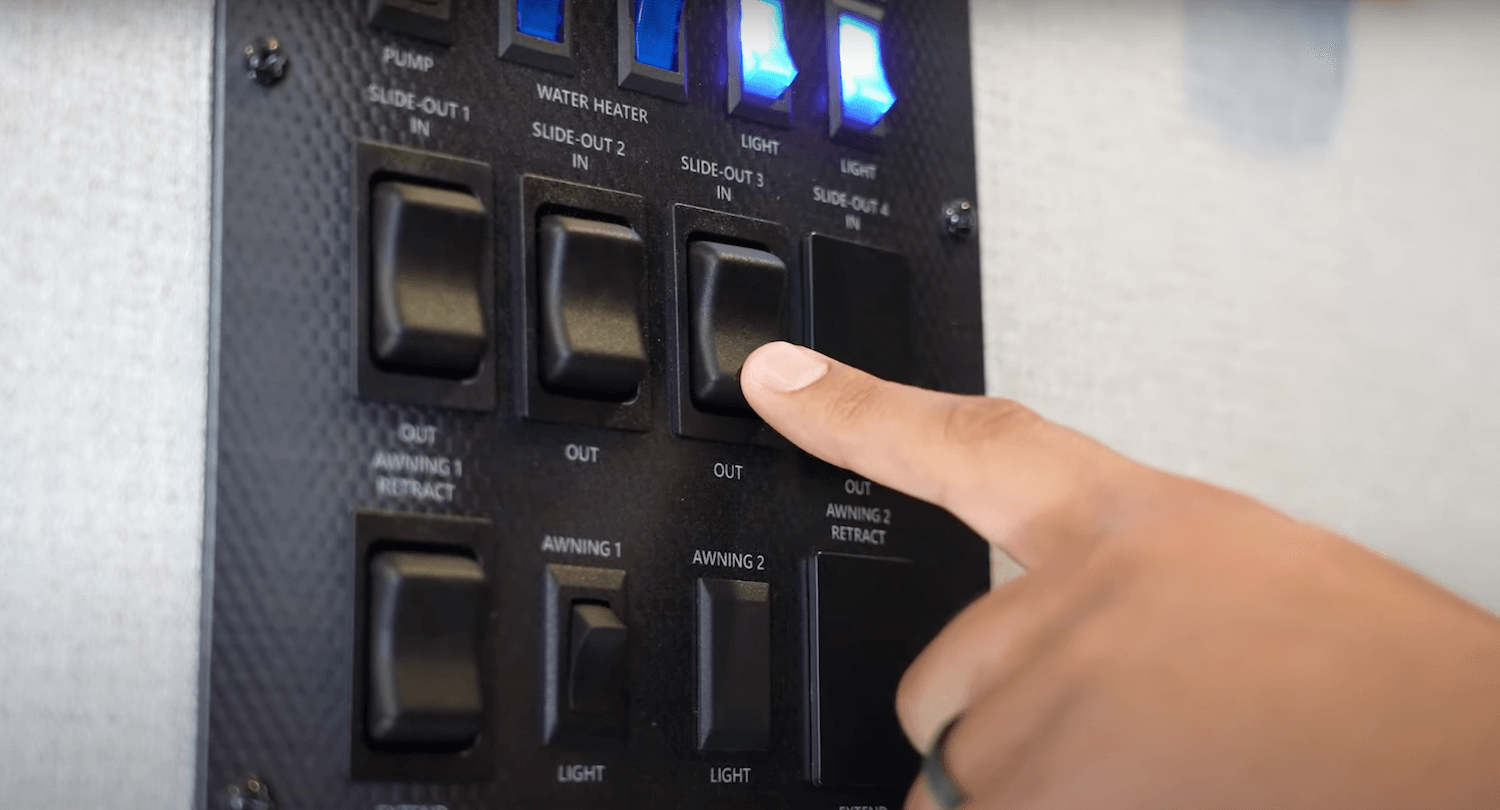 Photo by Camping World
Now that you’ve confirmed proper clearance and power for your slide to extend, follow these steps:
Locate the slide-out control switch inside your RV. Depress the ‘Out’ or ‘Extend’ side of the switch to extend your slide-out. Listen for the slide-out motor winding down or groaning, indicating it’s time to release the switch. You may hear a clicking sound on some trailers when it’s fully extended. You may also notice interior lights dimming as the slide-out seals. On Schwintek systems, hold the switch for 5 seconds once the room is fully opened (or closed) for the control board to complete its calculations. Failure to do so will cause the room to go out of synchronization over time. Visually, look for the fascia on the interior of the slide-out to set flush with your RV’s interior wall. Never extend or retract slide-outs partially. They must be fully open or closed to maintain their seal and keep the interior of your RV waterproof.Optional: Install slide-room supports to reduce the chances of slide-out damage.
How To Retract RV Slide-outs
 Photo by Camping World
When it’s time to pack up, here’s how to retract an RV slide-out:
Remove slide room supports (if applicable). Check the areas around, above, and below the slide-out for obstructions. Do this on the interior and exterior of your RV. Use an RV ladder or go up on your roof (if it’s fully walkable) to ensure no obstructions have fallen on top of your slide-outs. Push the ‘In’ or ‘Retract’ switch to retract the slide-out completely. When retracted, the slide-out should be flush with the exterior wall of your RV. Install slide-out locks (if applicable)How to Manually Retract RV Slide-Outs
RV slide-outs can get stuck when extended if used improperly or not maintained. If you are in this unfortunate situation, check out the video to learn the process for the manual operation of your slide-out. Then, head to your nearest Camping World Service Center to have a technician inspect your slide-out before further use.
You can also call a service center to request a visit from a Camping World mobile technician if you’re not comfortable manually retracting your slides.
Keeping your RV slide-outs working properly with these best practices in mind during campsite setup and breakdown. Then, the next question becomes – where will you go next? A tropical snowbird destination or a staycation close to home?
Do you have any additional questions about operating or maintaining RV slide-outs? Leave us a comment below, and we’ll get back to you.
Copyright
© Camping World